Cedar Slat Privacy Screen with Built-In Planter Trough
Overview: what we’re building
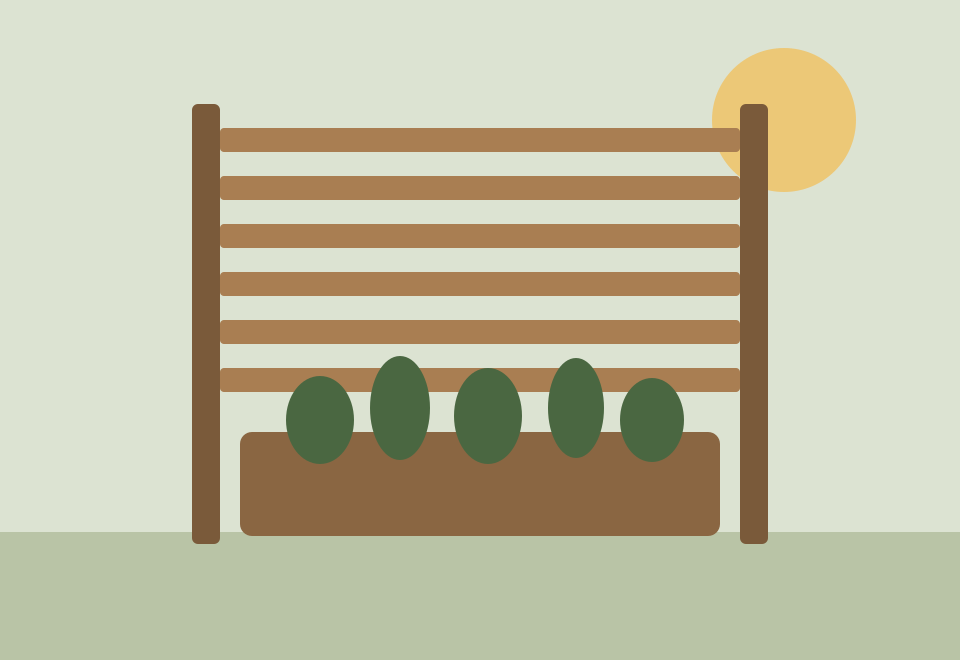
This is a 6-ft wide, 5-ft tall freestanding privacy screen with horizontal cedar slats and a planter trough built into the base. The trough does two jobs: it weighs the screen down so no concrete footing is needed, and it gives climbing plants a head start on softening the whole structure.
We designed it for a patio corner that faces a neighbor’s kitchen window. Total build time was a weekend — Saturday for cutting and assembly, Sunday morning for finishing. Every joint is a simple butt joint with exterior screws, which makes this a very forgiving first “real” project.
Materials & price list
| Item | Qty | Unit price | Line total | Cheaper substitute |
|---|---|---|---|---|
| Cedar 2x4 x 8 ft (posts & frame) | 4 | $12.98 | $51.92 | PT pine 2x4 (−$5.50/ea) |
| Cedar 1x4 x 6 ft (slats) | 14 | $6.48 | $90.72 | Cedar fence pickets, ripped (−40%) |
| Cedar 1x8 x 6 ft (trough) | 3 | $14.25 | $42.75 | — |
| Exterior screws #8 x 2½" (1 lb box) | 1 | $9.97 | $9.97 | — |
| Penetrating cedar oil (quart) | 1 | $16.48 | $16.48 | Skip & let it silver ($0) |
| Landscape fabric (trough liner) | 1 | $2.96 | $2.96 | Old feed bag ($0) |
| Total materials | $214.80 | Budget version: ~$139 | ||
Step-by-step process
Cut everything first
Cut both 2x4 posts to 60", the four frame rails to 68", and trim each of the fourteen 1x4 slats to exactly 72" — most 6-footers are actually 72¼".
PRO TIP — Stack-cut the slats three at a time with a clamped speed square as a fence. Identical lengths matter more than perfect lengths.
Build the frame ladder-style on flat ground
Lay the two posts on your patio and screw the top and bottom rails between them, checking diagonals are equal — that’s your squareness check. Two screws per joint, countersunk.
Space and attach the slats
Use a scrap of 1x4 laid flat as your spacer for a ¾" gap, which reads as “designed” rather than “fence.” Start from the top rail down so any awkward final gap hides behind the trough.
PRO TIP — Run a chalk line down the middle and add one screw per slat there too — this is what prevents slat warp. We learned the hard way.
Build the trough box
A simple 5-board box: two 1x8 sides at 68", two ends at 10", one bottom ripped to fit. Drill nine ½" drainage holes in the bottom — skipping this is the #1 way these builds die.
Join screen to trough and line it
Stand the screen inside the back edge of the trough and screw through the trough’s back wall into both posts, four screws per post. Staple landscape fabric inside so soil never touches wood directly.
Finish, fill, plant
Two coats of penetrating oil, 4 hours apart, before filling. Then 3 cu ft of potting mix and whatever climbs in your zone — we used star jasmine. The soil weight (~90 lb wet) anchors the whole screen.
PRO TIP — Oil the slat edges and end grain generously; end grain drinks 10x more finish and is where graying starts.
Issues we hit (and the fixes)
Every build article on this site documents what actually went wrong. Here’s ours — both fixable in under 30 minutes if you catch them early.
Three of the top slats cupped away from the frame after the first hot day. Cedar 1x4s are thin, and single screws at each end let the middle move freely.
One additional screw through the center of each slat into a vertical 1x2 cleat added down the back of the screen. Cupping pulled flat immediately.
Two slats came from a different lumber batch with mill glaze — a shiny surface that repels oil. They finished visibly lighter than the rest.
A quick scuff with 120-grit paper broke the glaze; a second coat blended perfectly. Test finish on every board’s offcut before committing.
Final cost & verdict
The build ledger
Verdict: The highest impact-per-dollar build we’ve done this year. Six-month durability check-in is scheduled for January — subscribe to The Weekend Ledger and we’ll send it to you.
Frequently asked questions
How long will a cedar privacy screen last outdoors?
Do I need a permit to build this?
Can I use pressure-treated pine instead of cedar?
Build these next
All projects → Patio & Deck
Round Paver Fire Pit — the Under-$150 Version
A 3-ring retaining-block pit with proper airflow gaps, built on a gravel base that drains.
 Lighting & Ambience
String Light Posts That Don’t Lean (Planter Base Method)
Weighted planter bases hold 10-ft posts rock solid — no digging, renter friendly.
 Patio & Deck
Attached Mini Pergola Over a Back Door
A 6x4 ledger-mounted pergola that adds instant architecture — with the load math explained simply.